Showing posts with label Food. Show all posts

Thursday, March 17, 2011

Happy St. Patrick's Day!

As an Irish Catholic girl growing up I definitely knew the two most important things to get done on St. Patrick's Day: 1) to make the Irish Soda Bread 2) prepare the Corned Beef and Cabbage. Both of these items were completed today with much love and excitement. I forgot where I had put my mom's recipe for the Irish Soda Bread, but I remembered there were only a few ingredients so I borrowed one from a website and added in dried cranberries as my fruit. What a great soda bread!


Here is the recipe:

Ingredients

  • 4 cups all-purpose flour, plus extra for cranberries
  • 4 tablespoons sugar
  • 1 teaspoon baking soda
  • 1 1/2 teaspoons kosher salt
  • 4 tablespoons (1/2 stick) cold unsalted butter, cut into 1/2-inch dice
  • 1 3/4 cups cold buttermilk, shaken
  • 1 extra-large egg, lightly beaten
  • 1 cup dried cranberries

Directions

Preheat the oven to 375 degrees F. Line a sheet pan with parchment paper.
Combine the flour, sugar, baking soda, and salt in the bowl of an electric mixer fitted with the paddle attachment. Add the butter and mix on low speed until the butter is mixed into the flour.
With a fork, lightly beat the buttermilk and egg together in a measuring cup. With the mixer on low speed, slowly add the buttermilk mixture to the flour mixture. Combine the cranberries with 1 tablespoon of flour and mix into the dough. It will be very wet.
Dump the dough onto a well-floured board and knead it a few times into a round loaf. Place the loaf on the prepared sheet pan and lightly cut an X into the top of the bread with a serrated knife. Bake for 45 to 55 minutes, or until a cake tester comes out clean. When you tap the loaf, it will have a hollow sound.
Cool on a baking rack. Serve warm or at room temperature.

If you do not want to buy a whole half gallon of buttermilk than you can pull a tip from my Grandma and take the same amount of required of regular or skim milk and add a teaspoon of lemon juice and you are all set!

The Irish Blessing


“May the road rise up to meet you, may the wind be ever at your back. May the sun shine warm upon your face and the rain fall softly on your fields. And until we meet again, May God hold you in the hollow of his hand.”


GOOD LUCK!

Sunday, December 12, 2010

Holiday Cannoli: Store-made Shell, Homemade Filling

Happy Holidays!

So my husband wanted to bring Cannoli's, his favorite dessert, to his work holiday party. He didn't want to be consumed with all of the work involved in making them (it was a weeknight), so he decided to stop by the grocery store and pick up the Cannoli shells from the bakery and we would make the filling ourselves.

25 Mini Cannoli Shells
He brought home 25 mini Cannoli shells and we began setting up the assembly line.

Cannoli making assembly line
In order to make the chocolate chip filled Cannoli's with crushed pistachio nut ends, we set out all of the items needed for the process: Cannoli shells, ricotta cheese, chocolate chips, and pistachio nuts.

Step 1: Take the ricotta cheese out of the tub and put it in a thin towel or cheesecloth.

Ricotta cheese out of container and into the towel.
Step 2: Squeeze out excess liquid.


Step 3: Mix 1 large tub ricotta cheese with a tsp cinnamon, tsp nutmeg, tsp vanilla, tsp Kahlua, and 1 cup chocolate chips. Place in plastic bag and snip corner to allow ricotta cheese to be piped into the shells.


Step 4: Pipe ricotta cheese into Cannoli shells.


Step 5: Shell pistachio nuts, put in coffee grinder and crush them for 15 or so seconds. Place them in a small dish.

Step 6: Dip filled Cannoli shell ends into crushed Pistachio nuts for the finished product.

Finished Cannoli's!

Enjoy!

Holiday Hint: Even the most complex holiday desserts can be attainable with a some relief from Santa's Little Helpers... i.e. the grocery store baking staff :)


Sunday, October 31, 2010

Note-to-Self: Caramel Apple Adventure

Happy Halloween! So this is by far my favorite holiday to celebrate all year...spooky front porch decorations, making fall wreaths, decorating the mantel, carving pumpkins, baking pumpkin seeds, costume craziness, candy, and of course Caramel Apples! There are so many things to do around this fall holiday that I thought I would take my first turn at making Caramel Apples - how hard could this be?

To start out, I actually was able to pick up a kit from Keopsels Farm in Baileys Harbor, WI on my last trip in August. This kit looked like a lot of fun, and very tasty too!

Keopsels Caramel Apple Kit
Next, I was able to set out all of my items that I would be using to construct these apples. In the picture below there are my 6 small to medium green apples, wooden sticks, fluted wax paper cups, chopped peanuts, caramel, and a small hammer.

Keopsels Kit items
Why use Green Apples? Green apples (or Granny Smith Apples) hold up better than any other apple because of its firm skin and crisp interior - these apples will not mush on you!

My first task was to get all of the wooden sticks into the green apples. By using a small hammer, I was able to tap lightly on the end of the sticks (which were tapered at one end) to go nicely into the apples. Turn the apples upside down so that the bottom is facing up towards you.

Green Apples with wooden sticks inserted.
Note-to-Self: Caramel is not your friend! So... the instructions stated to put the container of caramel into the microwave for 1 minute, stir, then another 30 seconds. When I took the caramel out of the microwave I had about one nanosecond to put some caramel onto the first apple before it started to harden! Yuck! I would definitely suggest a double-boiler situation here where you would have a low heat on the caramel to get a nice thin smooth consistency while applying all apples with the caramel. I ended up trying to reheat the caramel for each apple to get a thin covering. This did work, but for future caramel apples, I will for sure do a double-boiler. After getting the caramel onto the apples, then press the apple into the crushed peanuts. I put the crushed peanuts into a smaller bowl so that they were easily managed.

Caramel dipping station.
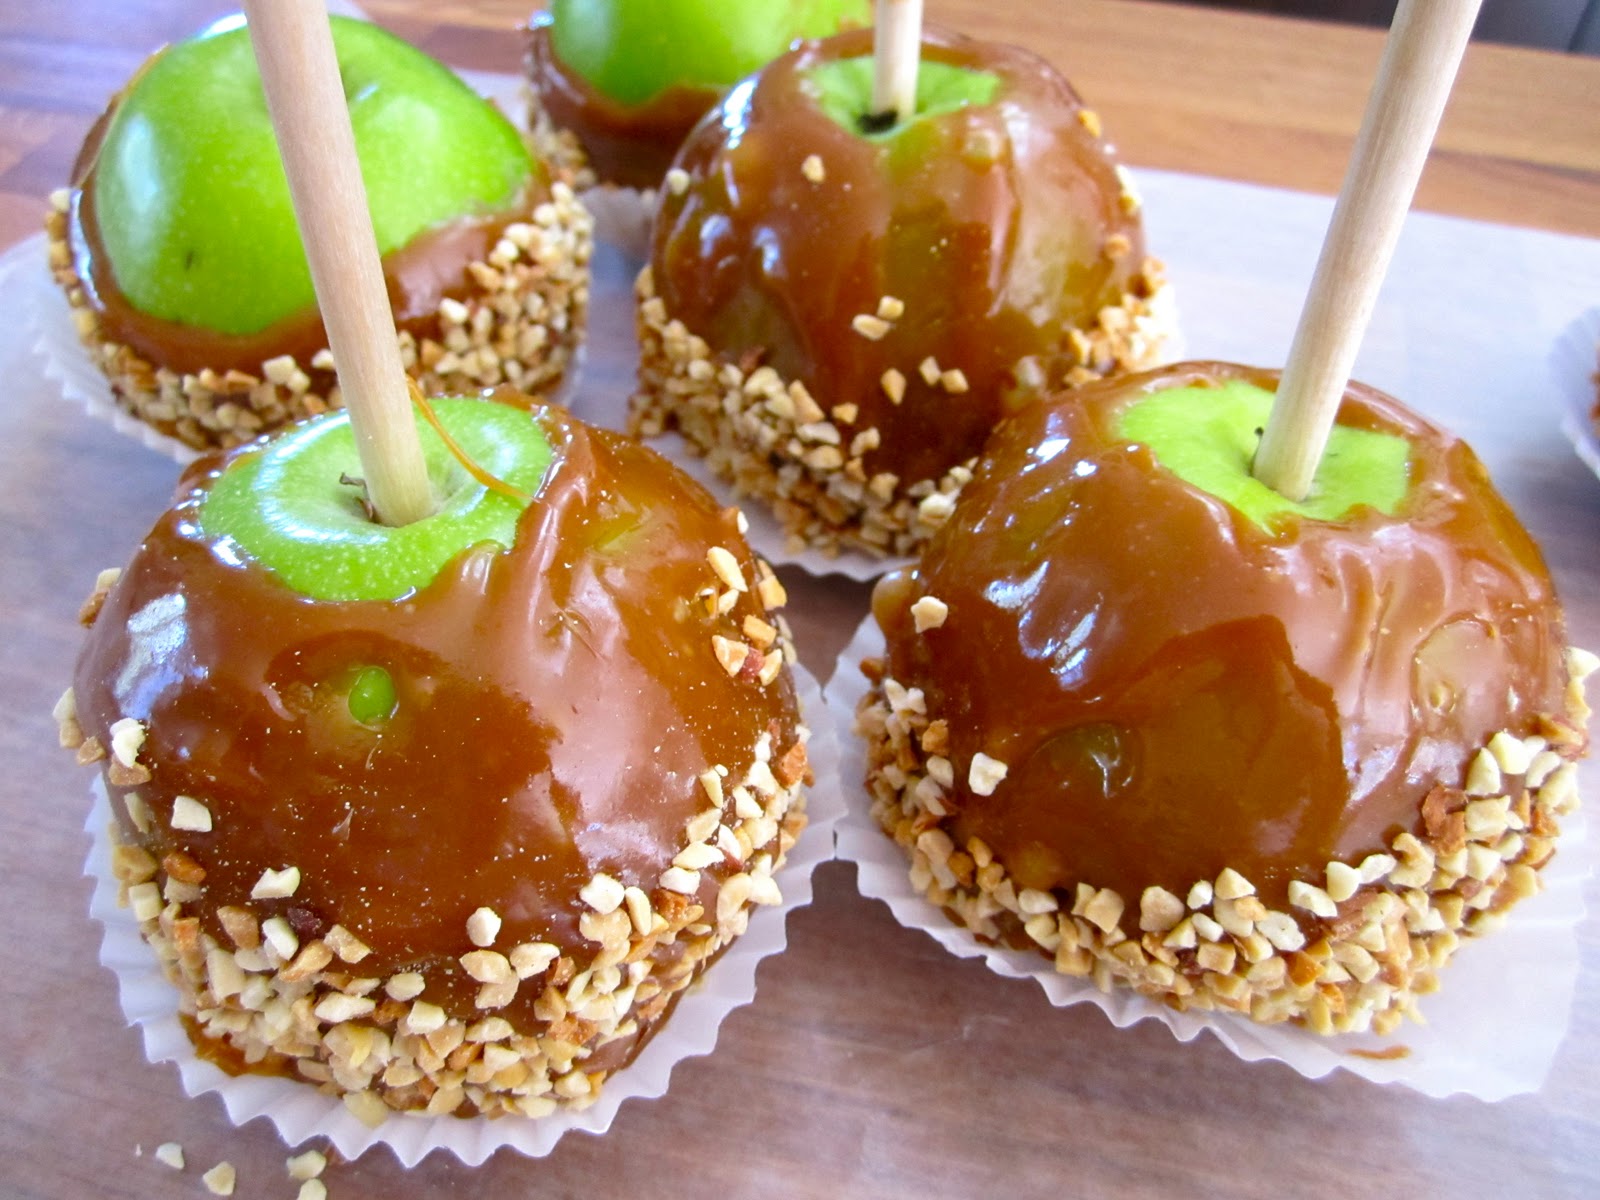
This was a fun fall project and I was really happy that I learned some new "tricks" for the trade. Below is the final product! Happy Halloween - have a spooky day!

Yummy apples!
Beautiful fall treat!